How to Make an Origami Tulip
Making these simple origami flowers is fun for little ones who just started exploring paper folding. Even preschoolers can make the origami tulip for Mother's Day, Valentine's Day, or just because.
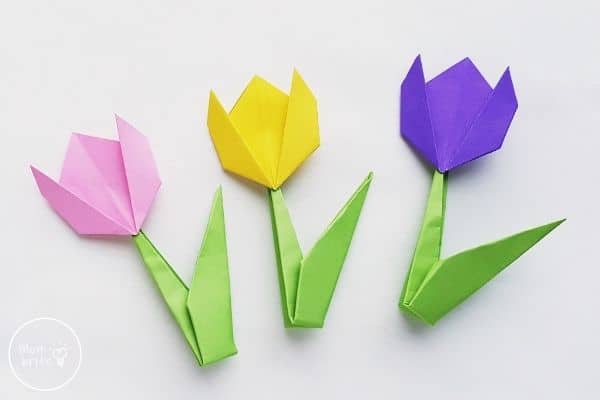
Have your kids tried the Japanese art of paper folding? It's a fun activity to do on a rainy day and inexpensive because you just need paper.
Origami paper is now easy to purchase, and you can get a set like this for under $10. But if you don't have origami paper at home, you can simply use printer paper or construction paper. Simply fold the top right corner to the left edge and then cut out the excess paper on the bottom. Unfold the paper and you get yourself a square!
These tulips are one of the easiest origami flowers you can make, so it's perfect for kids who are new to paper folding. The stem may be a little difficult for preschoolers, but they can be in charge of folding the flower and you can help fold the stem.
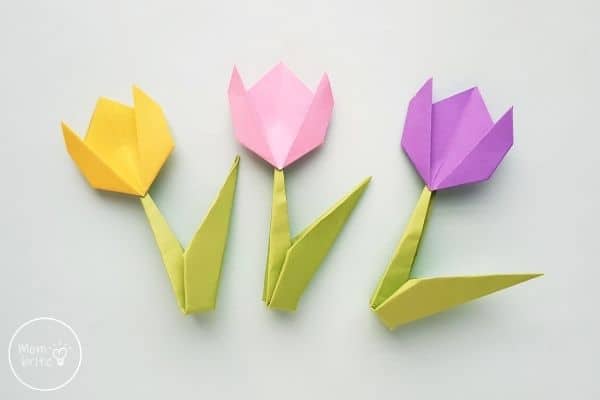
Below are step-by-step instructions on how to fold the origami flower, but after you fold a few of them you will probably be able to make it by memory. You can create a whole garden of tulips by spreading open the bottom of the stem slightly and standing them up. You can also glue the origami tulips on greeting cards or the bottom of your windows to decorate the house.
How to Make an Origami Flower with Stem
Materials:
- Colored construction or origami paper
- Glue stick
- Scissors
Step-by-Step Origami Tulip Tutorial
Make the Origami Tulip Flower
Step 1: Select a piece of green construction or origami paper for the stem and leaf, and another color for the tulip flower. Grab the selected paper for the origami tulip and cut it into a square shape if it's not one already.

Step 2: Fold the paper into half diagonally.
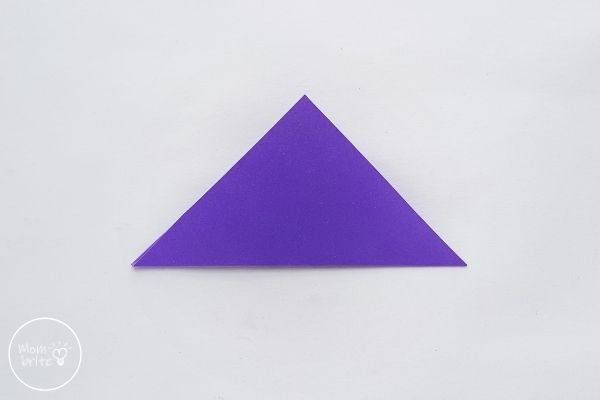
Step 3: Fold the paper into half again to create a crease line along the center of the triangle.

Step 4: Hold any one side (corner) of the folded paper and fold it to about 30 degrees towards the inside.

Step 5: Similarly, fold the other side (corner) of the paper.
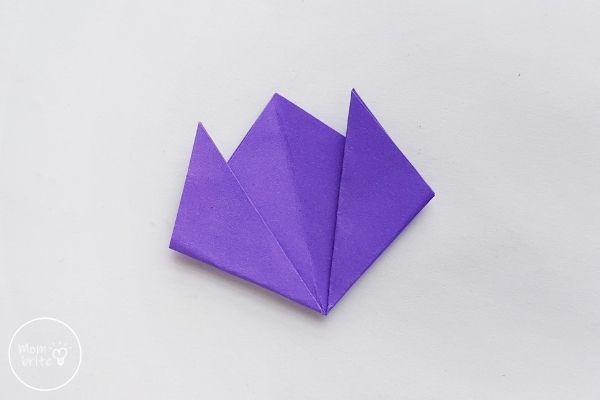
Step 6: Flip the paper to the other side (backside).
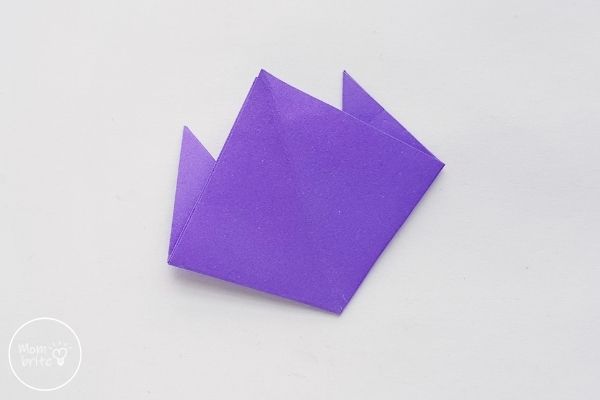
Step 7: Fold the 2 side corners of the flower towards the inside, about 1 cm fold will do.
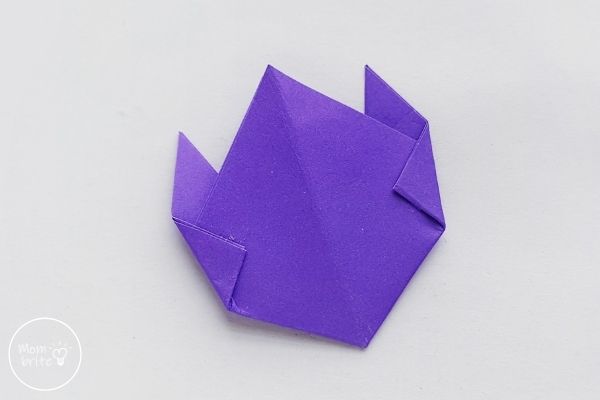
Step 8: Now, flip the paper to the other side again (the front side).
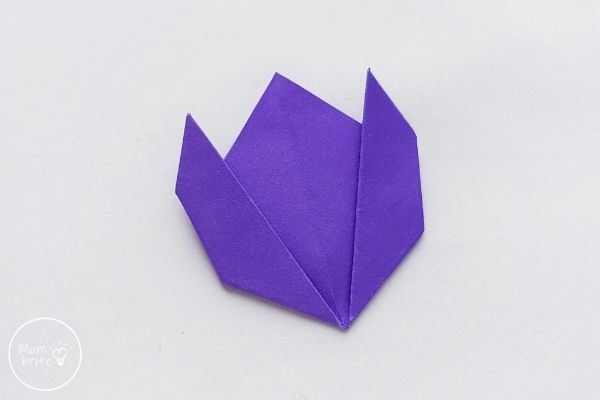
Make the Origami Tulip Stem
Step 9: Prepare a square paper from the green colored craft paper. The green paper should be an inch bigger on all sides than the paper used for the tulip craft. Make a diagonal fold on the green paper to form a crease.

Step 10: Hold a corner on either side of the diagonal crease and fold it towards the inside, aligning the side of the paper with the diagonal crease. Similarly, fold the other side of the paper.

Step 11: Now, fold in the short sides of the paper and align them with the diagonal crease.

Step 12: One last time, fold in the other sides of the paper and align them with the diagonal crease.

Step 13: Now fold the diamond-shaped paper in half.

Step 14: Fold the paper again, but this time vertically with the narrower side on the inside.
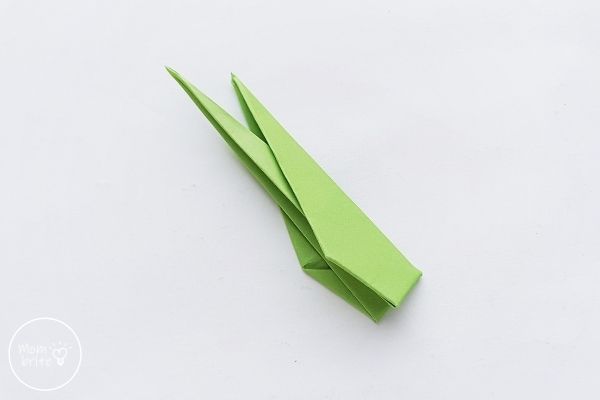
Step 15: Take the two top corners in your fingers and slightly open the fold diagonally to separate the 2 parts of the origami paper. The thin part of the paper will be the stem and the wider part will be the leaf.

Step 16: Attach the origami tulip on the top end of the stem part using glue.

Now you are. done with the origami flower! Was it harder or easier than you thought?
Tulips come in a variety of colors, like red, purple, yellow, and pink. You can make a whole set of origami tulips in different colors and put them together to make a beautiful tulip garden!
Related Posts:
- How to Make an Origami Balloon
- How to Make an Origami Ninja Star
- How to Make a Paper Fortune Teller
- How to Make an Origami Corner Bookmark
- 3D Origami Paper Star Zodiac Constellations
- Pretty Paper Flower Craft for Kids
Source: https://www.mombrite.com/origami-flowers-tulip/
0 Response to "How to Make an Origami Tulip"
Post a Comment